My 1996 Grand Cherokee 4L Laredo

Ask questions or share info that applies across makes or models, things of general off-road interest.
Ri
Richard Moss
Rank: Junior

Thu Nov 15, 2012 12:18 am

Sept 18th 2011:

Unfortunately, having had to work over part of the weekend, I am not quite as far along as I'd hoped. Still, one major job has been done - CV boots.

The design is quite clever - basically a FWD type driveshaft, running up the middle of the axle tube to the differential. It doesn't need an inner CV joint because the splined end of the shaft slots into the diff (like on the back end of a live-axle car such as an MGB or TR7).

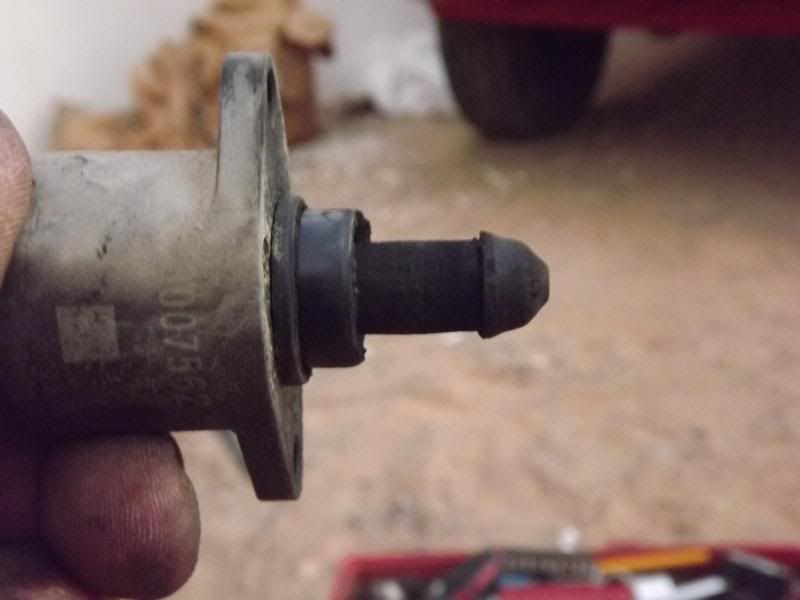
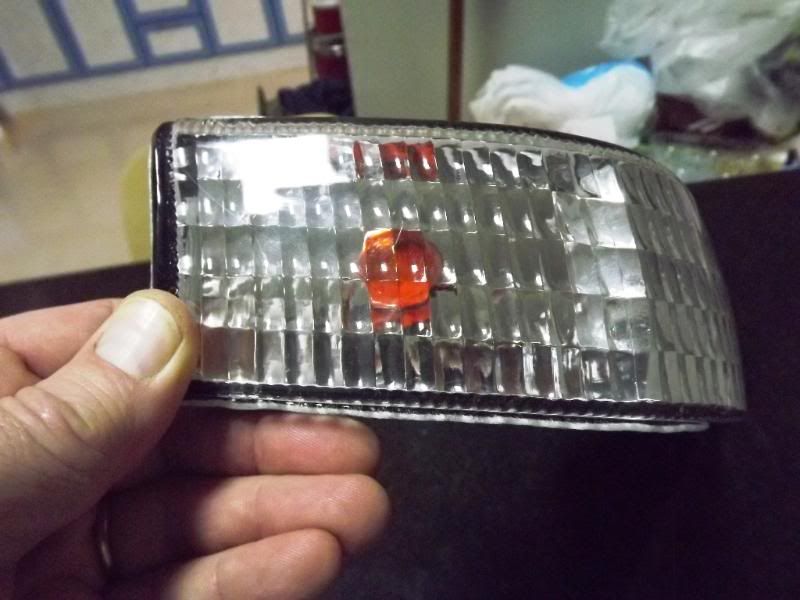
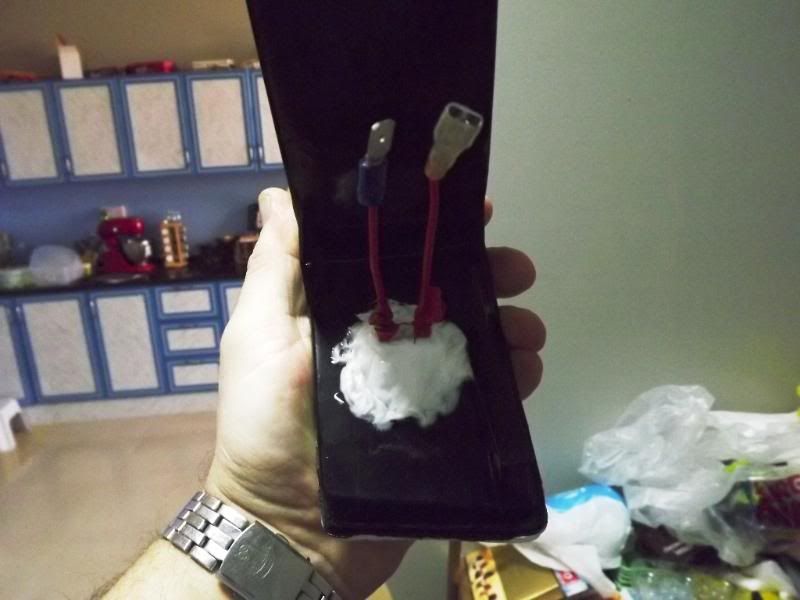
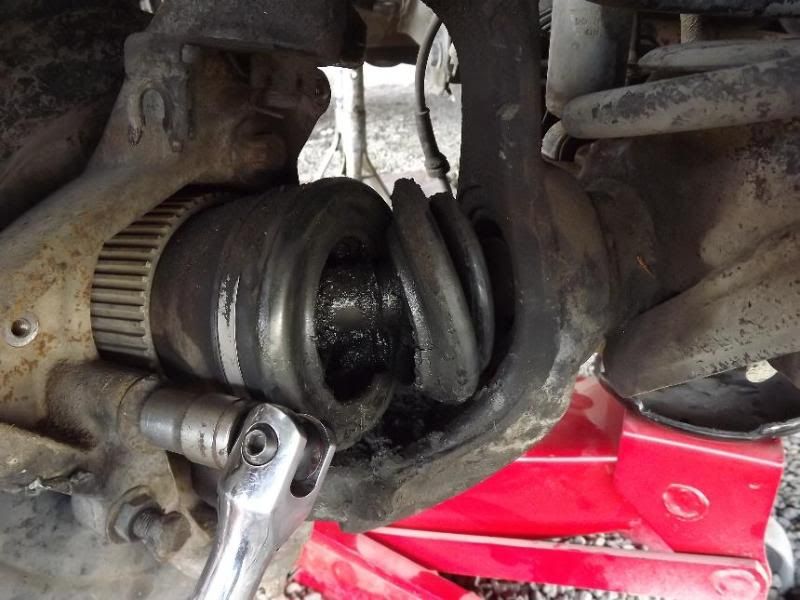
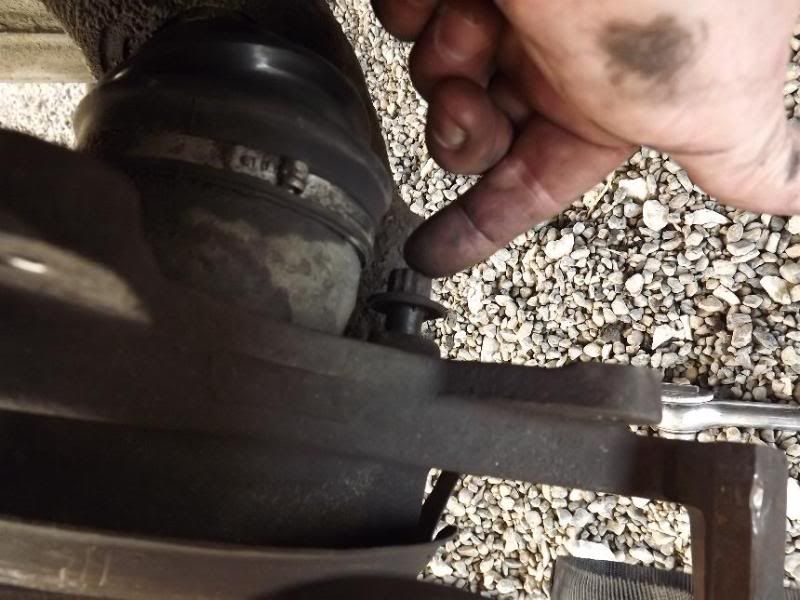
The offending items looked like this. You can see that the torn one was full of dirt which I washed out using carb cleaner before regreasing.:
Image
Image

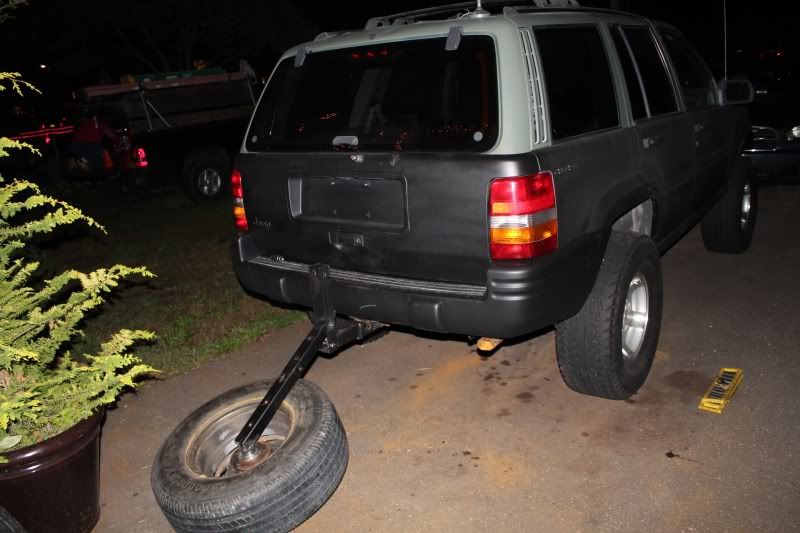
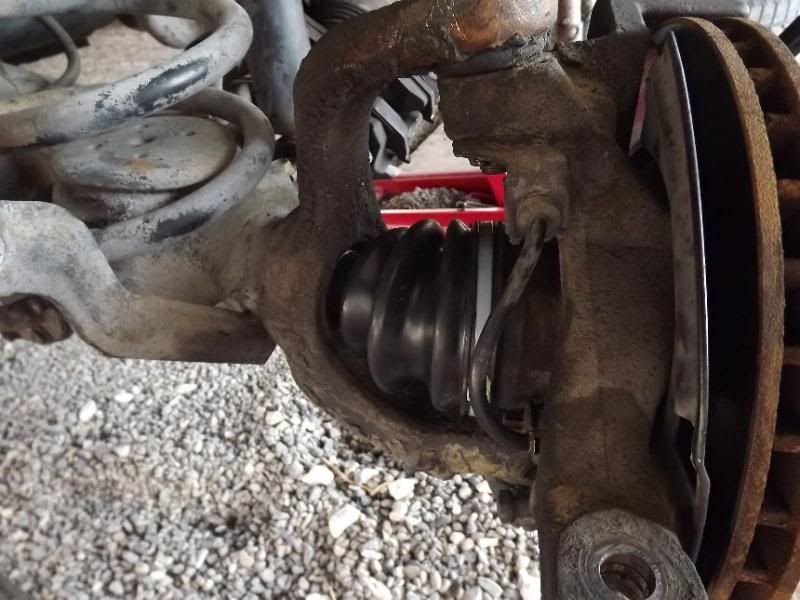
Doing the job is much like the front of a FWD car - brakes off is step one. However, the Jeep axle has a clever design that allows the brake caliper AND disc to be removed without having to remove the caliper carrier:
Image

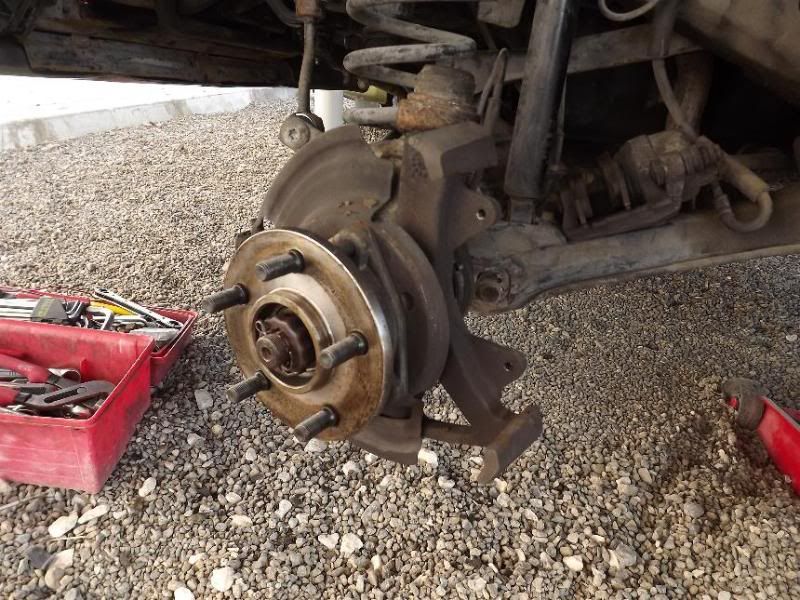
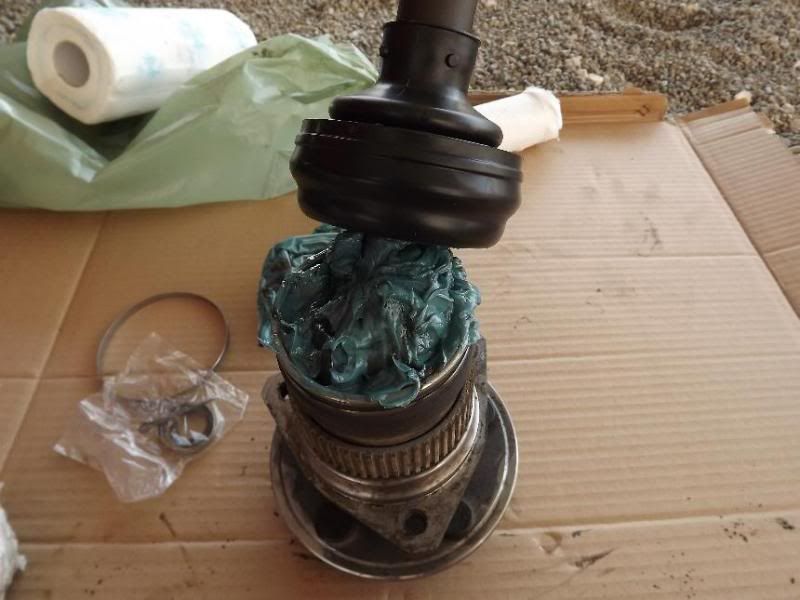
The workshop manual talks about dismantling the front hub and bearings, balljoints and so on and I did some of that before realising that there was an easier way. The hub is held in with 3 bolts and if you remove them you can slide out the hub, brake dustshield, CV joint and half-shaft as one unit.
Image
Image

Then the old boot can be removed, grease cleaned out, new grease pushed in and a new boot fitted.
Image
Image

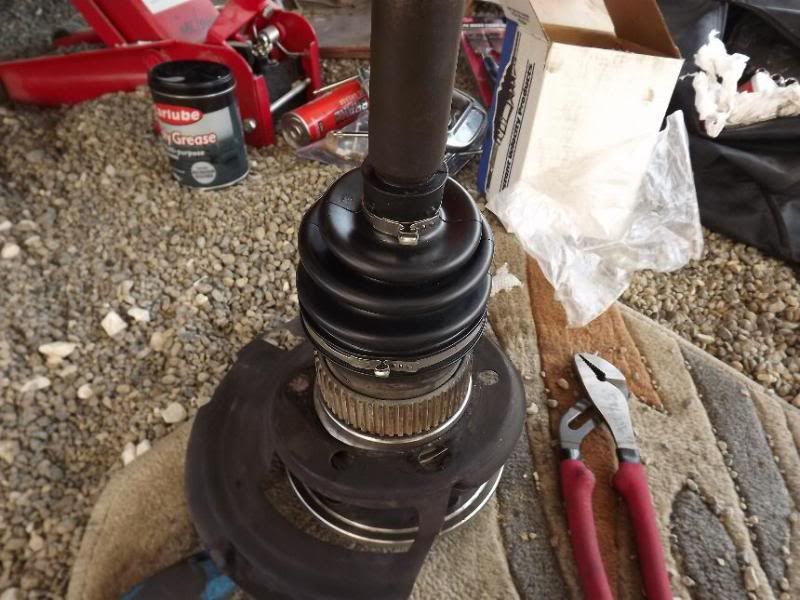
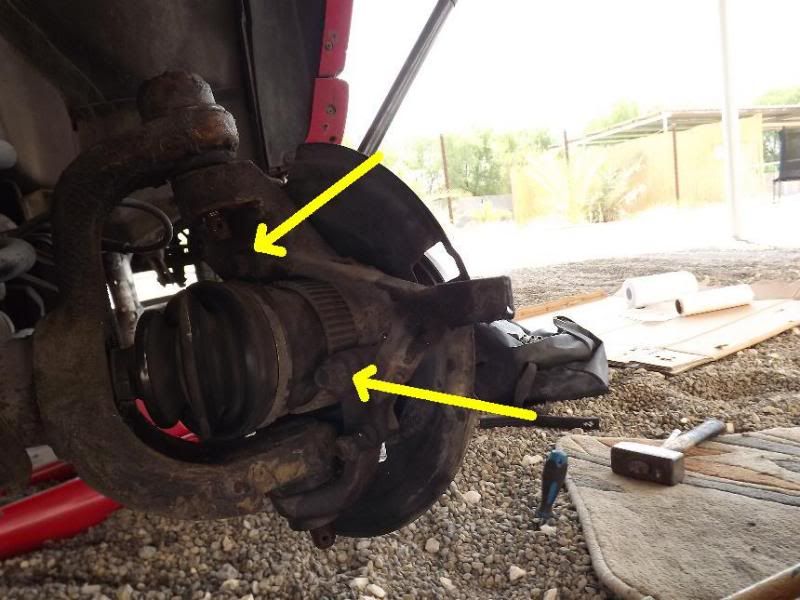
I then found that the boot-securing band fouled the axle, so it had to be removed and a heavy duty cable tie was fitted AFTER the shaft was back in.
Image

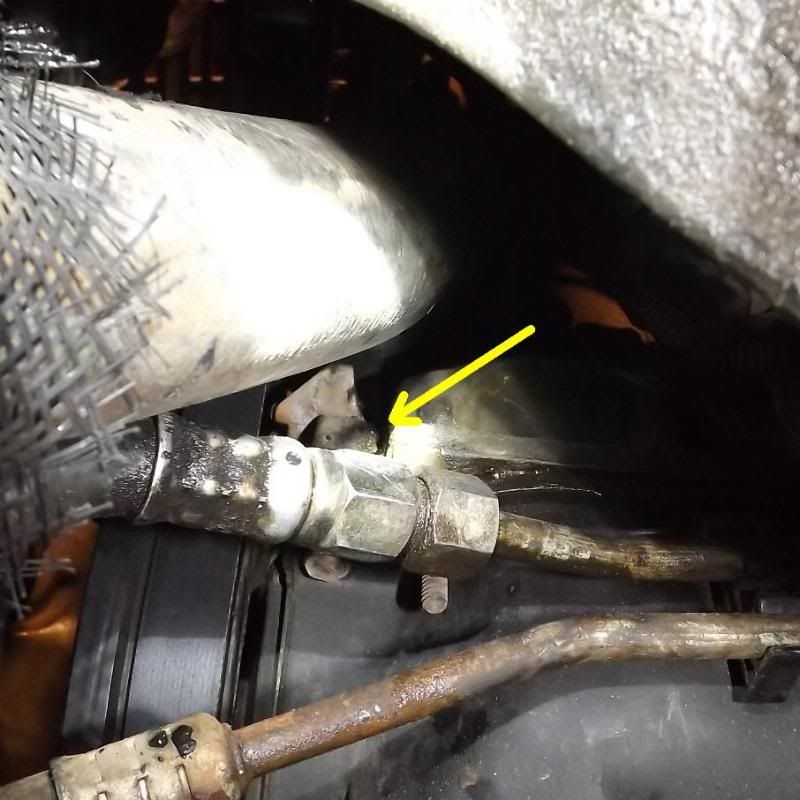
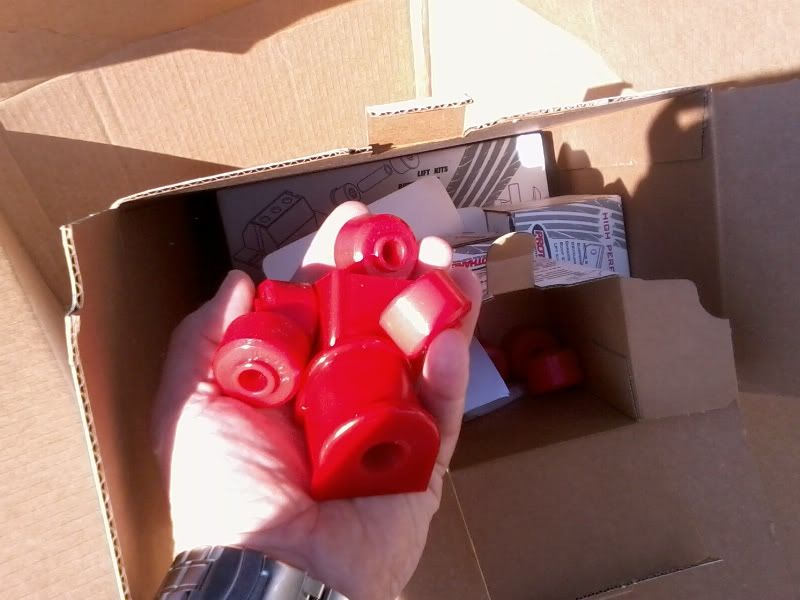
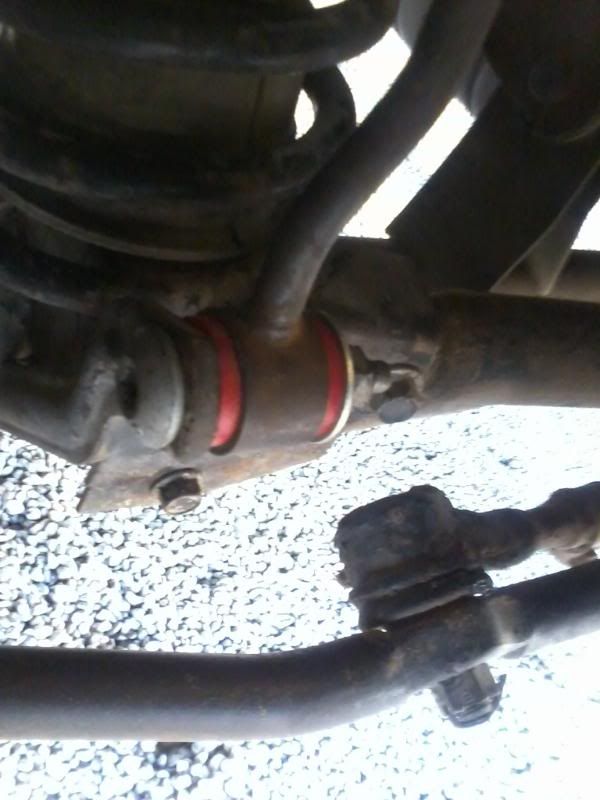
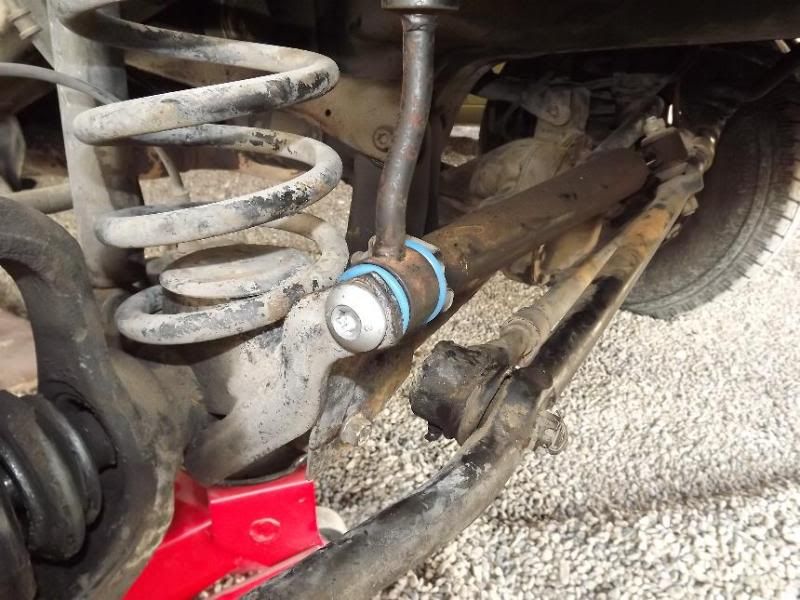
The missing ARB droplink bolt was replaced, along with new bushes (they need to be removed, though, to fit a couple of washers). Steering and front end control are dramatically improved!
Image

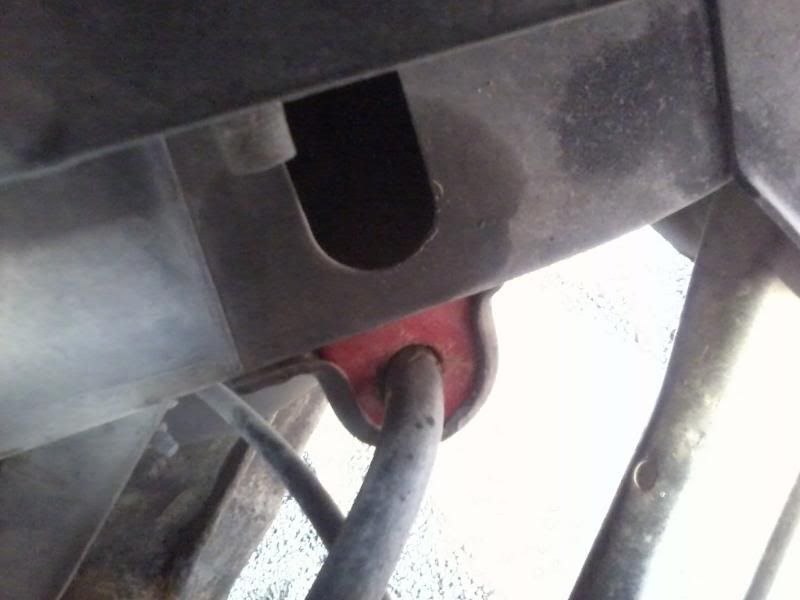
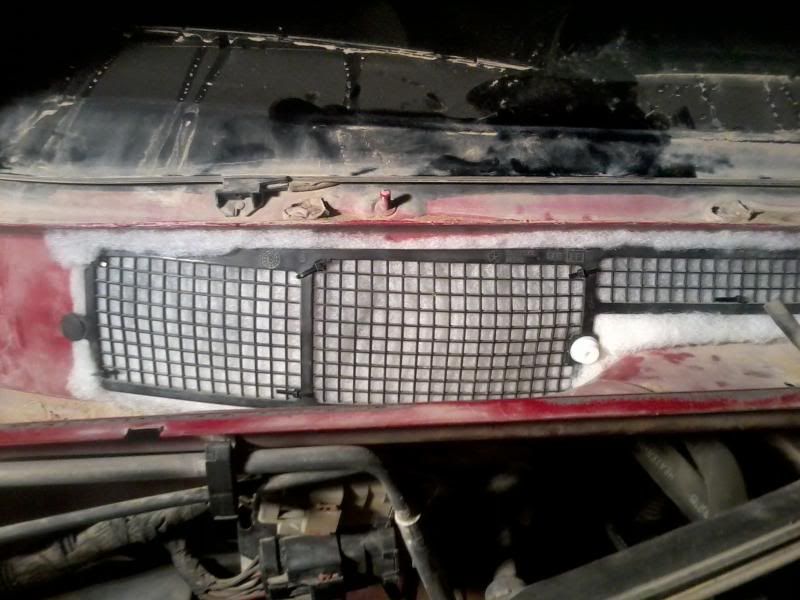
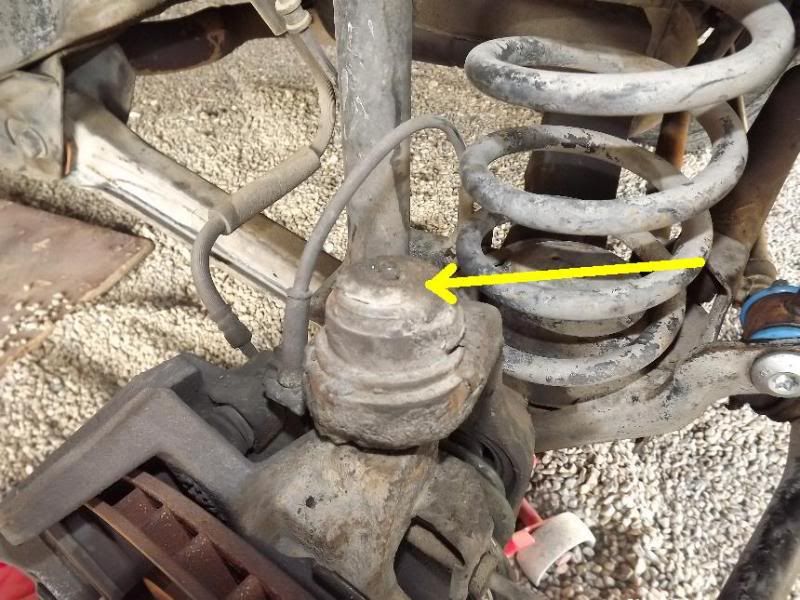
There was a grease nipple under all this - so that was cleaned up and the joint regreased, along with about 5 or 6 others
Image

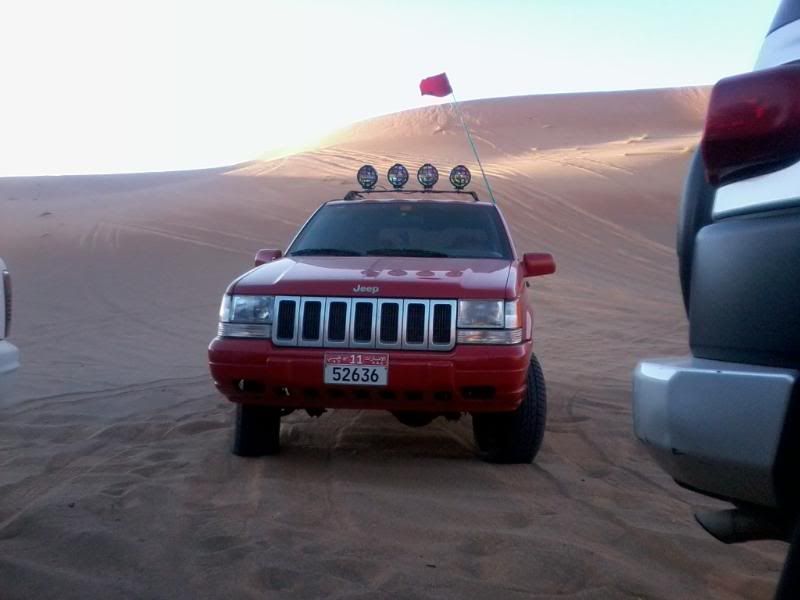
Just about ready for the roadworthiness test now.
Ri
Richard Moss
Rank: Junior

Thu Nov 15, 2012 12:18 am

Ri
Richard Moss
Rank: Junior

Thu Nov 15, 2012 12:20 am

Oct 5th 2011:
I forgot to put up a picture of the new headlights, so when I also replaced the missing foglight last night I decided to kill two birds with one stone.
Image
Image

I also changed the distributor cap, rotor arm and spark plugs but forgot to buy new leads so will try to do that tomorrow. I also cleaned the idle air valve - these get gunked up and cause erratic idling and as you can see, it was gunked up! It's nice and clean now, though (although I forgot to take a photo of that).
Image

Most of the bulbs in the Vehicle Information Centre had blown - so I replaced these. This, though, is the most useless thing that you can imagine because it just lights up to show you which wheels have "drive". Sounds good until you think that the two options are 1) permanent 4 wheel drive and 2) Neutral. However, I think that if it was in Neutral, I might be able to tell WITHOUT the aid of the VIC! EDIT: now that the transfer box has been changed to an NP242, the VIC doesn't work any more anyway!
Image

To be fair, it does also tell me if I'm in Low ratio.
Image
Ri
Richard Moss
Rank: Junior

Thu Nov 15, 2012 12:21 am

Oct 8th 2011:
I did manage to change the front differential oil and unfortunately found quite a lot of metal shavings in there. I have no idea how old the oil is but it did look suspiciously like ATF in there rather than gear oil.

The gear faces on the diff and pinion look OK so hopefully it's the axle shaft bearings as they are relatively easy to replace. I have put new oil of the correct grade in there and will check it in a few thousand km to see what's what. Changing the rear becomes a priority now!

Whilst under the car I found water dripping on my head and it looks like the water pump has sprung a leak. That's a bit of a nuisance because it would have been really easy to replace whilst the radiator was out (and in hindsight I should have done that as a precautionary measure). On the plus side, as an eternal pessimist, I had already ordered a new pump and it should be here tomorrow or the next day.

The rear anti-roll bar droplinks didn't get done, though!

Oct 9th 2011:
A box of bits (including water pump) arrived today. One other item in there was the ambient air temperature sensor that is used by the VIC and trip computer. Slotted straight in and worked perfectly - showing 34C at about 6.30pm.

When I get a towbar fitted, I'm tempted to make up one of these external wheel carriers as the boot loses a lot of space to the spare. it would be removable and I'd only use it when I really needed the boot space but it's quite a neat idea - although I'd have it sitting lower down so that it didn't obscure too much of the rear window. The photos are from http://www.jeepforum.com/forum

Image
Image
Image
Image
Ri
Richard Moss
Rank: Junior

Thu Nov 15, 2012 12:21 am

Oct 10th 2011:
Another pile of stuff arrived today - some new indicator/sidelight units (so cheap that they were almost free) and the replacement heater controls. Too busy to fit them tonight, that will have to wait until tomorrow.

Oct 15th 2011:
Still haven't done the lights and heater because I've had some other "issues" to deal with.

I slightly frustrating day yesterday.

I had a water leak from around the area of the water pump and so I got hold of a new pump, thermostat and gaskets and fitted them to the car. The old ones were, it has to be said, about as bad as I can ever remember seeing.

Image
Image

The thermostat housing was badly corroded, too.
Image

I cleaned up all the rust, goo, knackered gaskets etc and it all went together well. However, whilst the pump and stat appear to be water tight I am still getting a drip from the bottom, front corner of the block by the bottom of the timing chain cover. So I'll going to have to pull that cover off to see where the water is coming from.

Image
Image

From what I can see there are no obvious weak spots there (such as core plugs) so there is a chance that there is some sort of breach in the water jacket that will have to be dealt with. Hopefully it will be fixable.......perhaps with some sealant or Chemical Metal or JB Weld.

This is the sensor for the outside air temperature - it's hidden by the grille when that's in place.
Image
Ri
Richard Moss
Rank: Junior

Thu Nov 15, 2012 12:22 am

Oct 17th:
A bit more progress.

I finally managed to remove the crank pulley/harmonic damper which REALLY put up a fight despite using the right type of puller. A ten minute job turned into 1 1/2 hours! This gives me a better view of the area and I can see that it looks like water is seeping out of one or two of the bolt holes at the top of the timing cover, diverted down the side of the cover by accumulated grease and grime and then dripping off the bottom of the block. Judging from the staining, it's been doing this for a while. The area under the pump now looks dry, because I cleaned up the grot and the water is now running down the front of the cover.

I ran out of time to remove the cover and as I have to help a friend with a job on her Chevy Astro van tomorrow evening, I may not get to look at this again until wednesday. In the meantime, the very dirty cover has been sprayed with degreaser and will be cleaned up properly before removal.

I'm expecting to find that someone has used over-long bolts and/or over-tightened them and broken through to the water jacket. I'm hoping that some sealer will fix it up. I'll also check out the timing chain whilst in there and swap that if necessary.

I may bung a precautionary bottle of K-seal in there when it's all back together. This is not the environment in which to suffer a coolant leak.

Oct 19th 2011:
I think I've got to the bottom of it now - or should I say the top?

The water appeared to be coming from behind the timing cover or at least from the area around the join of the two so I pulled the cover off but could find no sign of a leak. What I did find was that the chain guide/tensioner had broken and had dropped into the bottom of the cover yet had somehow managed to avoid getting caught up in the chain and doing some damage (although I'm sure that it would just have been a matter of time). For reference the second shot shows where it should be fitted.

Image
Image

So, add new "tensioner/guide" to the shopping list.

Then, whilst cleaning off the old gaskets, I found the actual cause of the leak - a pinhole in the (rusty) heater return pipe that attaches to the water pump. I'd refitted the old pipe to the new pump - mistakenly, as it turns out! Somehow, the water had been tracking down the side of the pump unseen, only coming into view lower down. So, remove the pump and add "heater return pipe" to the list.

Image

Whilst at it, I thought I'd play safe and do some more future proofing. I've no idea how old the hoses are so "bottom radiator hose" joined the list. Then I thought I'd see if my favourite parts shop could provide a new "thermostat housing/water outlet" so that went on the list too, along with the requisite gaskets.

More in hope than expectation, I set off to the shop this evening and..................they had it all in stock! The purchase prices are about the same as I would pay over the internet from the USA but I saved the shipping costs and got it immediately. RESULT!

I'm in a good mood tonight and aim to start putting it back together tomorrow.
Ri
Richard Moss
Rank: Junior

Thu Nov 15, 2012 12:23 am

Ri
Richard Moss
Rank: Junior

Thu Nov 15, 2012 12:24 am

December 2nd 2011:
Full set of polybushes:

Image
Image

New towbar with removable hitch.
Image

One bonus - whilst the Jeep was at Mehran's garage having the new transfer box and towbar fitted, they resprayed my rear pillar vents without me even asking. A nice freebie that tidied up some scruffy, flaky paintwork.
Image

Something I forgot to mention before is the indicators. You may recall that I replaced the original amber ones with clear ones bought from http://www.rockauto.com for about $8-10 each but they were slightly different fron the originals because they had two holes for fitting bulbs rather than the original's single hole. The original bulb holder fits the hole on the front but the one on the side was smaller. I didn't have any spare bulb holders so opened the hole out and squeezed in a larger, orange bulb and then used silicon sealant to hold it in place. Once the wiring was spliced into the original loom I had twice as much light from the indicator. Not the prettiest job behind the scenes, but it looks OK from outside!

Image
Image
Image

Yesterday I fitted polyurethane bushes to the anti-roll bar. The difference is HUGE and the Jeep rocks and rolls a lot less in corners than it used to. The bushes were part of that kit from Prothane and I now have to find the time to fit the remainder of the kit to the control arms and track bars. There will be some loss of ride confort on the road but I think that's a fair trade off for more secure handling. Whilst talking of suspension, it's off to new shocks fitted all round tomorrow and (hopefully) get lifted by about 2". Then it will be time for some bigger tyres, followed by something else and something else and something else...........hobbies can be expensive!
Ri
Richard Moss
Rank: Junior

Thu Nov 15, 2012 12:25 am

December 5th 2011:
I fitted the polybushes to the anti-roll bars at the weekend and it made a huge difference to the way it corners. It's just had the suspension lifted (2" extra height = better ground clearance of course) and had new heavy duty shocks fitted. I would normally do it myself but it's actually cheaper to have Mehran specialist do it for me than for me to buy the bits myself. I took a quick spin around the block with the new setup and it feels really taut now. I may have time to get some new tyres before the next trip out on wednesday evening but we'll have to see.

The catalytic convertor is still on there, even though the rest of the emissions control kit has been removed (not required here) - so it's spending an extra day at the garage having a straight through pipe fitted. A bit more power should be available after that

December 8th 2011:
Front and rear polybushes fitted to the ARBs:
Image
Image

Heavy duty front and rear shocks:
Image
Image

2" lift (on top of the 1" lift done by Jeep when it was built)
Image

How it was:
Image

So I took it out into the desert to try it out - and have to say that I'm very pleased with it.
Image
Ri
Richard Moss
Rank: Junior

Thu Nov 15, 2012 12:26 am

December 18th 2011:
A couple of hours of dune bashing after work this evening - very pleasant.

Image
Image

The light bar is made up from a spare roof bar with holes drilled for the light brackets.

The wiring is run from the foglights at the moment (because they are no longer fitted) but will be sorted properly using a separate switch and relay. There is a waterproof ( ! ) connector on the wiring so that it can be unclipped at roof level and I took the front end pieces off the roof rails so that I can slide the whole light bar off in no time at all. Removal takes seconds. It makes surprisingly little noise, to be honest, and I'm not too worried about the effect it will have on fuel consumption.

I've no idea if it wobbles badly because the surface on which we're driving is also wobbly! The light pattern from these cheap lights is awful, practically useless to be honest, but decent spot lights seem to be very expensive over here. I plan to buy some better ones when back in the UK (we fly back tomorrow for 3 weeks) so I'll let you know then. However, the concept works OK so it's just a case of getting some better lights.

Even if the current lights are no good, the kids reckon that they're "cool"!

10th January 2012:

I got sick of the inside filling up with sand, so whilst doing a couple of other jobs, I set to and made a DIY cabin filter. The material used is a synthetic wadding/padding used in clothes making and was a handily sized offcut that Mrs M had handy. I have seen people do this using the filter from a cooker hood but I reckon that it would block up with the sand we have here. The photos aren't great - the job was done after sunset, using electric light and taking pics with a mobile phone.

First I removed the wiper arms and scuttle panel. For all 800 owners, it's worth noting that the scuttle panel is rot-proof plastic, not badly painted steel! You can then see the pathetic grille used by Jeep - it wouldn't stop anything smaller than a marble.

Image

With the grille removed, you can see the sand inside the plenum. It was about 2mm thick and was easily picked up by the blower. I had to remove all this, of course.

Image

The wadding was roughly trimmed and fixed in place on the grille with cable ties before refitting the grille to the bulkhead. Scuttle and wipers back on and we're good to go.
Image

Other jobs done recently are fitting upgraded injectors (supposedly better power and economy), doing a better wiring job on the roof lights and fitting a better stereo than the rubbish JVC unit that was in there. I've still got to finish off fitting those suspension bushes........

Return to “General 4X4 and Off-Road”

Who is online

Users browsing this forum: No registered users and 7 guests